Laser Tracker Calibration: Field vs Lab
By Rina Takahashi • 12th Apr
Laser tracker calibration comparison hinges on a single, unforgiving reality: the tool that measures your critical parts is itself drifting in real time, and where you calibrate it (and how often) determines whether your data is trustworthy or dangerous. The choice between field and lab calibration is not academic; it is an engineering decision that shapes your uncertainty budget, your audit posture, and your scrap rate. For a step-by-step method to build an uncertainty budget for your tracker program, use our audit-ready guide.
Over years of validating measurement systems in small job shops and regulated manufacturing, I have seen the tension play out: lab calibration looks clean and traceable on paper, but field verification catches the drift that destroys confidence on Monday morning. This article cuts through the marketing fog and compares both methods using explicit tolerances, environmental reality, and cost, so you can shop by your workflow and your environment.
What Is Laser Tracker Calibration, and Why Does It Matter?
A laser tracker measures spatial coordinates by triangulating laser beam angles and distance. Still deciding between a tracker and a portable CMM for large parts? See our laser tracker vs portable CMM guide. Over time (due to wear, thermal drift, and optical shift) its angles and scale degrade. Calibration corrects these errors by mapping the actual measurement system against known standards.
Without regular calibration verification, you have no traceable proof that your tracker's data is valid. That matters because:
- Aerospace, medical device, and automotive inspectors demand documented calibration with traceability to the meter.
- A thermal drift of just 2 degrees Celsius per hour can corrupt your measurements across a long inspection run.
- Studies show laser tracker accuracy can improve up to 25 percent when systematic errors are identified and compensated through calibration.
The question is not whether to calibrate: it is when, where, and how often.
Lab Calibration: Controlled Environment, Limited Insight
What Happens in a Lab?
Lab calibration is performed in a climate-controlled facility using certified reference standards (ball bars, spheres, or length standards) with traceability to national measurement institutes. The tracker is warmed up, the environment is stabilized, and systematic errors are measured across a defined volume, typically in a dedicated calibration lab.
Advantages:
- Traceability to SI units. Your calibration certificate links directly to NIST or equivalent, which auditors expect.
- Reproducible conditions. Temperature, humidity, and vibration are controlled, so repeated measurements yield consistent error models.
- ISO/IEC 17025 accreditation possible. Third-party labs (MISTRAS Group and others) offer ISO 17025 and DAkkS-certified services, which satisfies formal quality systems.
- Documentation archive. A professional lab maintains calibration history and uncertainty budgets in writing.
Limitations:
- Your shop is not a lab. Temperature swings, vibration from machining, and coolant mist mean your tracker operates in conditions far removed from the calibration environment.
- Thermal coupling lag. A laser tracker requires 45-80 minutes of warm-up time before the laser and optics stabilize. If your shop temperature drifts 5°C between morning start-up and noon, your tracker has not adapted.
- Detection delay. You find out your tracker has drifted only after you ship a batch of parts or a calibration due date arrives.
- Cost and lead time. Shipping a tracker to an external lab, waiting for turnaround, and losing shop floor access adds expense and schedule risk.
Lab calibration proves your tool was accurate on the day it left the lab. It does not prove your tool is accurate now.
Environmental Context: Why the Gap Matters
A precision manufacturing environment is rarely stable. During a heat wave several years ago, our granite surface plate drifted enough to scrap an entire batch of indicator verification parts. I logged hourly temperature, humidity, and plate expansion, then re-baselined our gauge blocks. The data convinced management to invest in environmental control, not just a thermostat, but isolation pads, radiant barriers, and an HVAC retrofit. That single episode revealed that even "stable" shops live inside 3-5°C daily swings; our CMM was calibrated at 68°F but operating at 72°F by 3 PM. Assumptions and environment noted: any calibration certificate is valid only if your shop matches the stated reference temperature and humidity.
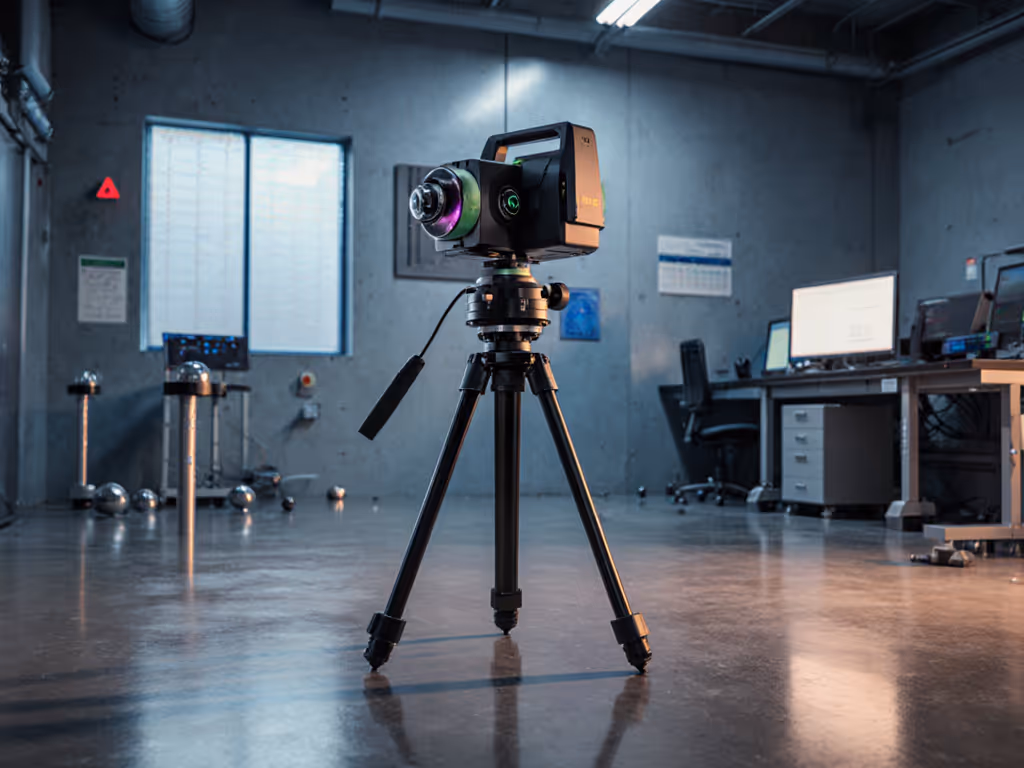
Field Calibration: Real Conditions, Continuous Verification
What Is a Field Interim Test?
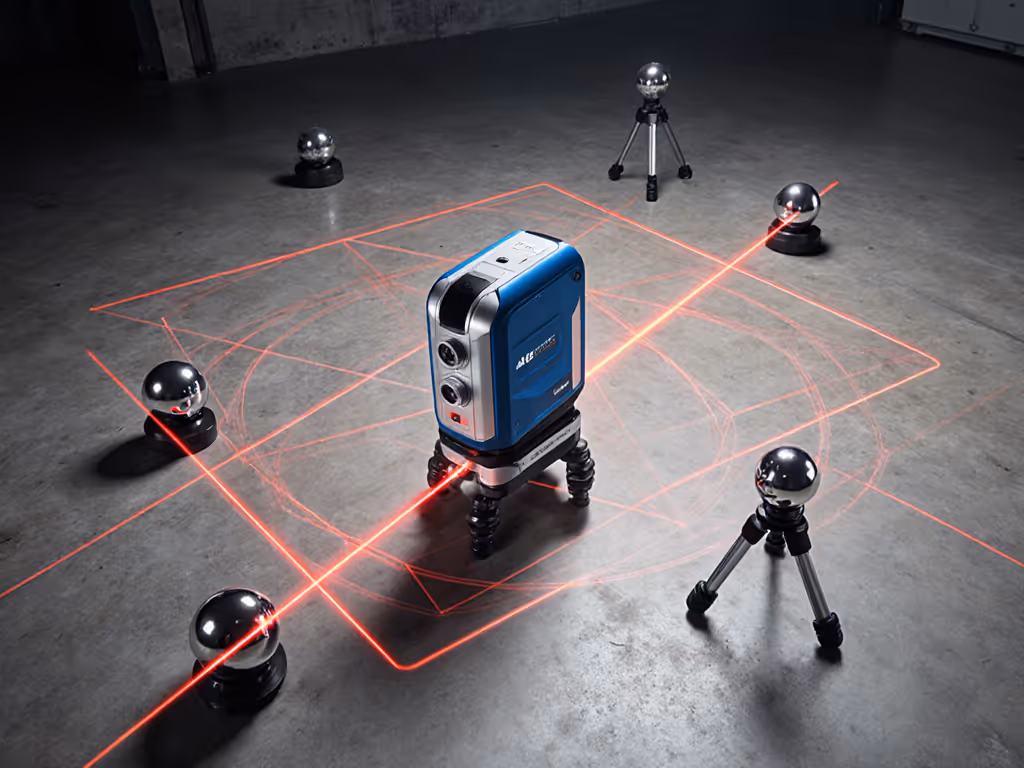
Field calibration, more precisely an Interim Field Test, is an on-site, periodic verification of tracker accuracy using portable standards and lightweight test protocols. The most recognized standard is NIST IR-8016, the NIST Field Test, developed with the U.S. Air Force (AFMetcal) to verify that trackers remain within manufacturers' maximum permissible errors (MPEs).
A typical field test takes 30-60 minutes and uses calibrated reference standards (ball bar, spheres, or length standards) staged around your measurement volume. The tracker measures each standard and the system compares the result to the certified value. If errors exceed specification, a shorter compensation routine (CompIT) can re-baseline the tracker in situ.
Advantages:
- Real environmental proof. You verify accuracy in your actual shop temperature, humidity, and vibration state, not a lab's idealized conditions.
- Continuous confidence. Run field tests weekly, monthly, or before critical jobs; data proves your tracker is in spec right now, not six months ago.
- Faster response. If a test reveals drift, you compensate immediately rather than waiting for a lab appointment.
- Traceable documentation. Field tests generate pass/fail reports tied to ISO 10360 standards and MPEs, which satisfy audits.
- Lower cost. A field test kit and trained technician cost far less than shipping and lab turnaround.
Limitations:
- Portable standards have limits. Calibrated reference bar or sphere sets have lower accuracy than lab-grade instruments; they introduce their own uncertainty.
- Skill dependency. A technician must set up the test rig, account for cosine errors, and interpret results correctly. Mistakes propagate.
- No deep error mapping. A field test checks accuracy at a few discrete points and ranges; it does not isolate every systematic error or thermal effect like a full lab calibration can.
- Maintenance burden. You are responsible for maintaining and calibrating the portable standards themselves.
The Interim Field Test Process
FARO's Pointing CompIT is a standard on-site compensation workflow:
- Three interim test points verify that the tracker meets specification across a defined volume.
- Six compensation points (at 2, 4, and 6 meters) recalibrate the tracker if errors are found.
- For long-range work (over 20 meters), the CompIT can be extended to your maximum working distance.
- Periodic backsight checks during a single long measurement job detect real-time drift and trigger a refresh if needed.
This approach embeds verification into workflow. You do not wait; you measure, verify, compensate, and continue.
Cost-Benefit: When to Use Each Method
Lab Calibration ROI
Choose lab calibration if:
- You are establishing a baseline or suspect systematic errors that field tests cannot diagnose (e.g., optical misalignment or mechanical play).
- You must meet formal traceability chains for aerospace, medical device, or defense contracts and your customer explicitly requires ISO/IEC 17025 certification.
- You operate in a highly unstable environment (frequent power tool use, rapid thermal swings) and need a professional assessment of environmental limits of use.
- You are supporting a major fixture or CMM comparison study and need reference-grade uncertainty budgets.
Cost model (approximate):
- External lab calibration: $800–$2,500 per tracker, depending on scope and accreditation level.
- Turnaround: 2-4 weeks plus shipping.
- Frequency: annually or as contractually required.
Field Interim Test ROI
Choose field interim tests if:
- You perform high-precision work regularly (tolerance stacks under ±0.05 inch or tighter) and need confidence before each job.
- Your environment is reasonably stable (±3°C, minimal vibration) but you want traceable proof of performance in your conditions.
- You have trained personnel on staff or available via service contracts.
- Downtime for travel to a lab is unacceptable.
Cost model (approximate):
- Portable calibration standards: $2,000-$5,000 one-time purchase (amortized over 5-10 years).
- Service contract or on-staff technician: $100–$300 per test.
- Turnaround: 1-2 hours, on-site.
- Frequency: weekly to monthly, depending on risk tolerance.
Hybrid Strategy
The most robust shops do both:
- Annual or biennial lab calibration to catch systematic errors and confirm that environmental controls are working.
- Monthly or pre-job field interim tests to verify that the tracker remains within MPE in real shop conditions.
- CompIT compensation before critical runs to reset the tracker if drift is detected.
This pairing costs more upfront but delivers explicit uncertainty budgets and audit-proof documentation. Shop by tolerance stack, environment, and workflow (or accept drift).
Thermal Effects and Drift: The Silent Killer
Neither lab nor field calibration solves the fundamental problem: thermal drift is continuous. After a tracker is calibrated, every degree of temperature change shifts its zero point. Studies show that thermal drift can be limited to less than 0.2 micrometers in environments with short-term thermal drift rates below 2°C per hour, provided the system is allowed to stabilize.
Implications for your strategy:
- Warm-up is not optional. Allow 45-80 minutes for laser and optics to reach thermal equilibrium before starting critical measurements.
- Monitor conditions. Log shop temperature and humidity during long measurement jobs. If conditions swing more than ±2°C, pause and re-stabilize.
- Compensation models help. Recent research shows that thermal deformation compensation can reduce registration errors from 0.103 mm to 0.02 mm on large systems.
- Document assumptions. Record the temperature, humidity, and date/time of your measurements so you can correlate any outliers to environmental events.
Accuracy Verification and Standards Compliance
ISO and NIST References
Laser tracker performance is evaluated under ISO 10360-5:2010 (for CMM-style trackers) and the NIST IR-8016 Field Test. Both define:
- Maximum Permissible Error (MPE): the largest error the tracker is allowed to have at any point in its working volume.
- Test volume: the typical sphere or hemisphere in which accuracy is verified.
- Compensation method: how systematic errors are corrected.
Audit compliance checklist:
- Calibration certificate with valid date, traceable standard reference, uncertainty budget (in micrometers), and environmental conditions (temperature, humidity, barometric pressure).
- Record of Interim Field Tests if performed, with pass/fail results and date.
- CompIT logs if compensation was applied.
- Documented limits of use (e.g., "valid only in environments between 68–72°F").
- Maintenance and replacement records for probe tips, reflectors, or batteries.
Practical Workflow Integration
Before a Critical Job
- Review your tolerance stack and calculate the required measurement uncertainty (typically 10:1 or 4:1 test accuracy ratio).
- Verify tracker environmental conditions match its last calibration certificate. If shop temperature differs by more than ±2°C, wait for stabilization or recalibrate.
- Run a quick Pointing Interim Test or CompIT to confirm on-site accuracy.
- Log start time, temperature, and humidity.
- Measure. Pause every 30 minutes to verify stable conditions.
- If conditions drift or tests fail, run a 5-minute CompIT and re-verify.
Between Jobs
- Schedule monthly field interim tests (takes 1-2 hours) to build a drift history.
- If drift trends appear, investigate: calibration drift, environmental control degradation, or reflector/probe damage.
- Plan annual lab calibration to re-establish baseline and check for systematic errors.
FAQ: Field vs Lab Calibration
Q: Do I need lab calibration if I run field tests weekly? A: Field tests verify current accuracy in your environment but cannot detect slow systematic errors (like optical misalignment) that a full lab calibration catches. Pair field tests with annual lab calibration for complete coverage.
Q: Can I skip calibration if the tracker was just shipped from the factory? A: No. Factory calibration is a baseline, not a guarantee of on-site accuracy. Thermal transients during shipping and differences in your shop environment mean immediate field verification is prudent.
Q: What is the typical drift rate for a laser tracker? A: Drift depends on thermal stability. In controlled environments (±2°C), thermal drift contributes less than 0.2 micrometers per measurement. In uncontrolled shops, drift can exceed 10 micrometers per hour if temperature swings are rapid.
Q: How long does a field interim test take? A: 30-60 minutes, depending on the test scope and number of range points.
Q: Who can perform field calibration? A: Any trained technician with a portable calibration standard kit and knowledge of ISO 10360 or NIST IR-8016 procedure. Some manufacturers (FARO, API, etc.) offer service contracts or on-site training.
Q: Is field calibration acceptable for aerospace/medical device inspection? A: Yes, if documented and traceable. Many aerospace and medical device suppliers accept field interim tests as evidence of accuracy, particularly if paired with annual lab calibration and environmental controls.
Moving Forward
Laser tracker calibration comparison is not a binary choice: it is a layered strategy. Lab calibration anchors traceability and catches systematic errors; field interim tests embed verification into daily workflow and verify real environmental performance. The right approach depends on your tolerance stack, your environment's thermal stability, your audit requirements, and your risk tolerance.
Start by answering these questions:
- What is your tightest tolerance, and what measurement uncertainty does it demand?
- How stable is your shop environment over a 24-hour and seasonal cycle?
- Are you audited by a customer, and if so, what calibration evidence do they require?
- How often do you run high-precision measurements?
- Can you afford downtime to send a tracker to a lab, or do you need in-house verification?
Once you have those answers, you can build a calibration roadmap, lab baseline, field interim tests on a cadence matched to your job mix, and CompIT procedures tied to temperature thresholds. Assumptions and environment noted: no single calibration frequency works everywhere. Your next step is to pilot a field interim test protocol in your shop, document the results for one full seasonal cycle, and compare drift trends to your tolerance stack. That data will tell you whether you need more frequent lab calibration, better environmental controls, or simply more disciplined warm-up and verification practices.
Do not assume your data is correct. Prove it.
Related Articles